Setting up your TikTok Ads Manager account takes less than 15 minutes when you know what to enter and what to avoid. The problem is that most beginners make at least one mistake during signup that either delays approval or locks in a setting they cannot change later.
This guide walks you through every step clearly: from opening the signup page to getting your account approved and launching your first campaign.
Whether you are in the United States, UAE, Canada, Vietnam, Morocco, Malaysia, or anywhere else TikTok Ads is available, this guide covers the details that matter for your region.
Get Free TikTok Ad Credit Up to $6000 [Limited Time Offer]
You’ll also find what to do if your account gets rejected, how payment works in your country, and what to do right after approval so your campaigns actually perform.

How Do You Create a TikTok Ads Manager Account?
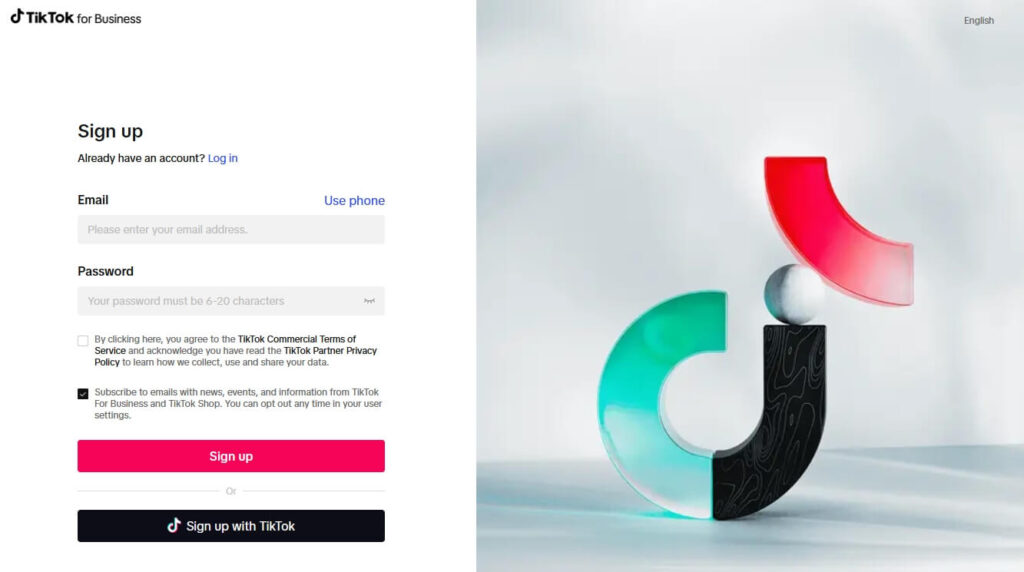
Go to ads.tiktok.com, click Get Started, sign up using your email or phone number, verify the code TikTok sends you, and enter your business details, including your country, industry, legal business name, time zone, and currency. Add your payment method and click Register. Your account goes into review. Most approvals come through within 24 hours. You can start building campaigns right away, but your ads will not run until approval is confirmed. Two settings cannot be changed after registration: your country and your time zone.
Before You Start: What You Need Ready
Gather everything listed below before you open the signup page. Having these ready prevents you from losing your session mid-setup or entering information that delays approval.
You will need:
- A working email address or phone number (for your verification code)
- Your legal business name exactly as it appears on your registration documents
- Your business country or region
- Your business phone number
- A live website with HTTPS (the padlock icon in your browser bar)
- A payment method accepted in your country (see the full table below)
- For business verification: a government-issued tax ID, business registration certificate, or equivalent document for your country
Two settings you cannot change after registration:
- Your country or region
- Your time zone
Get both right on the first attempt. Your country determines which ad formats, payment methods, and currencies are available to you. Your time zone controls how all your campaign reports and scheduling display.
Step-by-Step: How to Create Your TikTok Ads Manager Account
Step 1: Go to the TikTok Ads Signup Page
Open your browser and go to ads.tiktok.com. Click Get Started or Create an Account. You will land on the signup form.
You can sign up using:
- An email address and a password you create
- Your existing TikTok account (if you are already logged into TikTok in your browser)
- Your Google account
For most businesses, a dedicated business email is the cleaner approach. It keeps your ad account separate from personal accounts and makes adding team members easier later on.
Step 2: Enter Your Email or Phone Number and Set a Password
- Type in your email address or phone number.
- Create a strong password.
- Check the box to agree to TikTok’s Terms of Service.
- Click Sign Up.
TikTok sends a six-digit verification code to the email address or phone number you entered. Check your inbox or messages and enter the code on the next screen. Codes expire quickly. If yours expires, click Resend and check again.

Step 3: Enter Your Business Information
This is the most important screen in the entire setup. Take your time here. Every field matters.

Country or Region: Select where your business is located. This determines your available currencies, payment methods, and which TikTok ad products you can access. This cannot be changed later. If your business is in the UAE, select United Arab Emirates. If you are in Vietnam, select Vietnam. Do not select the United States unless your business is actually registered there.
Industry: Choose the category that best matches what your business does. This helps TikTok give you more relevant campaign suggestions. It does not restrict what you can advertise.
Legal Business Name: Enter your business name exactly as it appears on your official registration documents. TikTok checks this during account review. If the name you entered does not match your legal documents, your account may fail review or sit in a delay. Do not use a trading name or shortened version if it differs from your registered name.
Time Zone: Choose the time zone where your team works and reads reports. If your team is in Dubai, select Gulf Standard Time. If your team is in Hanoi, select Indochina Time. This affects when your scheduled ads run and how your daily reporting resets. It cannot be changed later.
Phone Number: Enter a working phone number. TikTok uses this for account updates and occasionally for verification.
Currency: Select the currency you want to use for billing. This is connected to your country selection. USD is available for U.S.-based accounts. AED for the UAE. VND for Vietnam. MAD for Morocco. MYR for Malaysia.
Once all fields are complete, agree to the advertiser terms and click Register.
Step 4: Complete Your Account Information
After completing the registration, you arrive at your dashboard. Before your account can be reviewed, you need to fill in the remaining details.
Hover over your profile icon in the top-right corner and select Account Info.
Complete the following:
Basic Information:
- Business type: individual or company
- Company website URL (must be live, HTTPS, and clearly describe what your business does)
- Business address
- Industry (confirm or update from your earlier selection)

Business Verification (optional but recommended): Upload a government-issued tax ID, business license, or equivalent document for your country. This step is not required to create your account, but it unlocks additional features and makes approval smoother.

For UAE sellers: your trade license is the accepted document. For Vietnam: your business registration certificate. For Morocco: your Registre du Commerce document. For Malaysia: your SSM certificate.
Step 5: Add Your Payment Method
Your account will not be cleared to run ads until payment is set up. Click Payment in the left sidebar or find it under Account Settings.

Here is a quick breakdown of accepted payment methods by region:
| Region | Accepted Payment Methods |
| United States | Credit card, PayPal, bank transfer (ACH) |
| United Arab Emirates | Credit card, bank transfer |
| Canada | Credit card, PayPal |
| Vietnam | Credit card, local bank transfer |
| Morocco | Credit card, bank transfer |
| Malaysia | Credit card, local bank transfer, FPX |
| North Africa (general) | Credit card, bank transfer |
You also choose your payment type:
Automatic Payment: TikTok charges your payment method when your balance hits a billing threshold or at the end of your billing cycle. This is the standard option most advertisers use.
Manual Payment (Prepay): You add funds to your account in advance, and TikTok deducts from that balance as your ads run. This gives you tighter budget control and is available in select countries.
Add your payment details, confirm, and save.
Step 6: Wait for Account Review
Once your business information and payment method are complete, TikTok automatically submits your account for review. You do not need to click a separate submit button.
You can check your account status by going to Tools, then Settings, then Account Setup, then My Account. Look under Basic Information for your account status.
It will show one of three things:
- Under Review: Your account is being assessed. Most reviews finish within 24 hours.
- Approved: You are ready to run ads.
- Not Approved: Your account failed review. See the next section for exactly what to do.
What to Do If Your Account Is Not Approved
Rejections happen more often than TikTok’s help documentation suggests. Here are the most common reasons and how to fix each one.
Your Business Name Does Not Match Your Documents
This is the most frequent rejection reason. If your registered name is “ABC Trading LLC” but you entered “ABC Trading,” TikTok’s system flags the mismatch.
Fix: Go to Account Info, edit your legal business name to match your documents exactly, and save. This triggers a new automatic review.
Your Website Does Not Meet TikTok’s Requirements
TikTok checks your website during review. Your site must be live, HTTPS-secured, clearly describe what your business does, and include a privacy policy page. A one-page site works fine as long as it meets these conditions.
Fix: Make sure your site loads correctly, shows HTTPS in the URL bar, and has a visible privacy policy. Update your URL in Account Info and wait for re-review.
Your Payment Method Was Declined or Incomplete
Some accounts go on hold when there is a billing error.
Fix: Go to Payment, remove the existing payment method, and re-enter your details carefully. Make sure the billing address matches exactly what your bank has on file.
How to Request a New Review
After fixing the issue that caused your rejection, go to Account Setup, then Basic Information, and click Request Review. TikTok reassesses your account, typically within another 24 hours.
What to Set Up Right After Approval
Most guides stop at “your account is approved.” These are the steps you should take immediately after that notification to make everything that follows work properly.
Install the TikTok Pixel
The TikTok Pixel is a tracking code that you can install on your website to capture user actions and send that data back to TikTok Ads Manager. Without it, your campaigns can’t optimize for conversions, and your retargeting audiences won’t build, limiting your ability to scale.
To create and install it:
1. Go to Tools, then Events

2. Click Connect Data Source and select Web

Note: You can use our free TikTok Pixel Setup Helper to quickly generate platform-specific installation code, including custom event tracking.
3. Choose your installation method: paste the code manually, use a partner integration such as Shopify or WooCommerce, or use TikTok’s one-click setup if your platform supports it

4. Select Pixel
5. Create and copy your base code for your website

6. Set up your conversion events: Add to Cart, Initiate Checkout, Purchase, Lead, Complete Registration

7. Verify installation using the TikTok Pixel Helper Chrome extension
For a more detailed, step-by-step walkthrough, check out our complete TikTok Pixel installation guide.
Install the pixel before you spend a dollar on campaigns. It is the single most skipped step by new advertisers and the one most regretted later.
Turn On Two-Step Verification
Go to your account settings and enable two-step verification (2SV). This adds an extra layer of security to protect your ad account from unauthorized access and unexpected spend. TikTok recommends enabling this immediately after account creation.

For Spark Ads, Connect Your TikTok Profile
If you plan to boost existing organic TikTok videos as paid ads, called Spark Ads, connect your TikTok profile now.
Go to Assets, then TikTok Accounts, and follow the authorization steps. This is only needed for Spark Ads. Standard In-Feed campaigns run without a connected organic profile.

Want to learn more about TikTok Ads Manager? Check out our complete guide for a full overview.
Set Up Your Business Center (If You Work With a Team)
If you work with a team, agency, or plan to manage more than one ad account, set up your Business Center at business.tiktok.com. This is separate from Ads Manager and works as the account management layer above it.

Inside the Business Center, you can:
- Add team members with specific roles and permissions
- Share your pixel and audiences across multiple accounts
- Grant agency or partner access using a Business Center ID, no shared login required
- Manage multiple brands or clients from one place
Your Business Center ID appears under Settings, then Business Info at the top of the page. Share this ID with partners and agencies. Never share your login credentials directly.
How to Find Your TikTok Ad Account ID
Your Ad Account ID is a unique number used when working with agencies, partners, or TikTok’s support team. Here is how to find it:
- Log in to ads.tiktok.com
- Look at the top-right corner of your screen
- Click the dropdown arrow next to your account name
- Your Ad Account ID appears directly below your account name

Keep it somewhere accessible. You will need it when linking to Business Center, granting agency access, or contacting support.
FAQs
How do I create a TikTok Ads Manager account?
Go to ads.tiktok.com and click Get Started. Sign up with your email or phone number, verify the code TikTok sends you, and enter your business details, including your country, industry, legal business name, time zone, phone number, and currency. Add your payment method, agree to the advertiser’s terms, and click Register. Your account goes into automatic review. Most accounts are approved within 24 hours. You can start building campaigns right away, but your ads will not run until approval is confirmed.
Is TikTok Ads Manager free to use?
Yes, creating and using a TikTok Ads Manager account is free. There are no monthly fees or setup charges. You only pay when your ads run. TikTok requires a minimum daily budget of $20 per ad group and $50 per campaign at the campaign level. You need to add a payment method during setup, but no charge is made until your first active campaign reaches its billing threshold.
How long does TikTok Ads Manager approval take?
Most TikTok Ads Manager accounts are approved within 24 hours of submission. Many approvals come through faster than that. If your account has not been approved after 24 hours, check Account Info under Account Settings to see if a rejection reason is listed. The most common causes of delay are a business name that does not exactly match your legal documents, a website that does not meet TikTok’s content requirements, or an incomplete payment method.
Can I create a TikTok Ads account without a registered business?
Yes. You can create a TikTok Ads Manager account as an individual without a registered company. During the business information step, select Individual rather than Company as your business type. You will use your personal name as the legal business name and your personal ID for any verification requests. Individual accounts have access to the same ad formats and targeting options as company accounts. Optional business verification documents are only needed if you want additional features like Creator Marketplace access or ad credit programs.
What is the difference between TikTok Ads Manager and TikTok Business Center?
TikTok Ads Manager at ads.tiktok.com is where you create and run ad campaigns. TikTok Business Center at business.tiktok.com is the account management layer above it. Business Center lets you manage multiple Ads Manager accounts, assign team roles and permissions, share pixels and audiences across accounts, and grant agency access using a Business Center ID without sharing login credentials. Solo advertisers running a single account can use Ads Manager on its own. Teams, agencies, and anyone managing multiple brands or clients need Business Center to manage access properly.
How do I log in to TikTok Ads Manager?
Go to ads.tiktok.com and click Log In. Enter the email address or phone number you used when you registered, along with your password. If you signed up using your TikTok account or Google account, click the matching Sign In button instead of entering credentials manually. If you have forgotten your password, click Forgot Password on the login screen and follow the reset steps sent to your registered email address.
Conclusion
Creating a TikTok Ads Manager account is straightforward when you know what to prepare. The most important decisions happen before you click Register: your country, your time zone, and your legal business name. Get those three right, and the rest of the process moves without friction.
After approval, the two steps that matter most are installing your TikTok Pixel correctly and choosing Custom Mode so every feature is available to you from day one. These two actions separate advertisers who build data-driven campaigns from those who spend budget without being able to measure or optimize results.
Your account takes around 15 minutes to set up and up to 24 hours to get approved. Everything you build after that depends on doing those 15 minutes right.